

I couldn't pass up on these since the price was so cheap. But I have no experience with Arduino at all and I'm totally lost, even after a few hours of searching links after links. Have Arduino 1.6.7 installed but I can't install the ESP8266 board package. I type in http://arduino.esp8266.com/stable/package_esp8266com_index.json in the Additional board Manager but it keeps failing? I might be way off since I have never attempted this stuff before. If I can't get it, not a big deal, but I'm willing to learn. Video Tut would be a life saver..:wow: Thanks Guys

If no one else responds to your post I will take some screen shots tonight when I'm home of the Arduino software and configuration to get the Generic ESP driver requires for upload. Also, did you get an FTDI programmer to upload to the ESPIXEL?
I had some problems following along with all the sub-links for setting up the board etc. and then usb driver problems with the FTDI programmer but eventually was able to upload the sketch and all is working now.
Shane

I am glad somebody asked this question also!....I like the write up on how to build the board is built but to program it is lacking. Are we going to have issues with the programmer we bought also with the fake chip issues?
2017 - Hmmmm...lots has changed...
Facebook: Stevensfamilylightshow
Youtube: Stevens Family Light Show
Web: http://www.stevenslightshow.com (under construction)

Well Bill's website http://www.billporter.info/ has some info on it, but not step by step instructions in regards to getting IDE setup. I know version 1.6.5 is on two of my computers and it works fine. Not sure if 1.6.7 has issues that have been corrected.
Shelby's pdf is helpful when it comes to getting Arduino setup.
http://forkineye.com/wp-content/uploads/2015/11/ESPixelStick-Assembly-and-Usage.pdf
Bill's code and Shelby's code will work on both.
Page 4 has some good instructions.
I'm not so sure about ver 1.6.7
As a side note, using arduino IDE to flash the board works great, but when you try to overwrite the board with new parameters like IP address or SSID I found I couldn't so I started using this : http://www.xess.com/blog/esp8266-reflash/ and using the most current firmware to reset it to a factory setting with 115k baudrate with the v0.9.5.2 AT Firmware available here https://github.com/JhonControl/ESP8266-Flasher/tree/master/Firmware%20ESP8266/Firmware%20ESP8266%20V0.9.5.2_AT
duramadmax wrote:I am glad somebody asked this question also!....I like the write up on how to build the board is built but to program it is lacking. Are we going to have issues with the programmer we bought also with the fake chip issues?
These are my thoughts exactly. They build took 20 minutes if that... but the programing, its another story.
Once you get it you'll say that wasn't so hard. Imagine writing the code. Lol
Sent from my XT1254 using Tapatalk

Hi guys, as I'm in the UK I'm not in on the current buy (we have to make our own, to the same spec) - That said, this programing is a very simple, but those who are embarking on the process for the first time it can be a little challenging to say the least. There are various processes required before the simple process of flashing can take place.
The forum doesn’t do group buys that can’t be used, so feel assured that your buy will work.
This is not out of the box working, but you don’t have to be a programmer to make it work.
As there are many videos with regard to the current Arduino setup, I’m sure you will be soon pointed to one that cures your problem, or one will be made.
I would however suggest if your struggling shout up now (as it has been known for people to wait it the wings hoping someone else will ask the question) it took me about 20 hours to get the Arduino format for the ESP to work last year and then 60 seconds to flash it.
So my advice – if it’s not working you need more advice – ask /post & don't waist hours of you life you'll never get back.
Robo wrote:I couldn't pass up on these since the price was so cheap. But I have no experience with Arduino at all and I'm totally lost, even after a few hours of searching links after links. Have Arduino 1.6.7 installed but I can't install the ESP8266 board package. I type in http://arduino.esp8266.com/stable/package_esp8266com_index.json in the Additional board Manager but it keeps failing? I might be way off since I have never attempted this stuff before. If I can't get it, not a big deal, but I'm willing to learn. Video Tut would be a life saver..:wow: Thanks Guys
Robo, perhaps you've already figured it out by now but if not and for those that haven't I will share my experience in my first time uploading to any type of Arduino product - in this case the aforementioned ESPixelGECE ESP8266 board from the latest group buy.
This is what I did, hopefully it'll help some:
1. Follow Mr. Porter's build instructions HERE
2. Download and Install the Arduino IDE (Integrated Development Environment) Software v.1.6.5 also linked from Bill's site HERE
3. Run the Arduino application then go to File --> Preferences and add this address ( http://arduino.esp8266.com/stable/package_esp8266com_index.json ) to the "Additional Board Manager URL's:" list. Then click "OK" to close the dialog box.

4. Navigate to Tools -->Board:xyz --> Boards Manager...

5. From the Boards Manager "Type" drop down menu select 'Contributed' and then select and 'Install' the "ESP8266 by ESP8266 Community Version 1.6.5..." package. This took a minute or two for me to download and install. Once it shows "Installed" you can close the Board Manager window.

6. Navigate again to Tools -->Boards:xyz and select the newly installed "Generic ESP8266 Module" as your board.

7. Connect your USB-->Serial adapter to your computer and install USB drivers as necessary - I had a bit of trouble with this one as referenced indirectly in other posts. This is the programmer I used, purchased through the group buy as an add-on. Once installed, select Tools --> Port:x (where 'x' is your specific Com port) in my case it installed as "COM3".

Part II to follow - apparently you can only upload 5 images per post.
Part II of II for Installation and Uploading the ESPixel Sketch to the ESPixel GECE ESP8266 board:
8. Download the ESPixelStick firmware HERE also as instructed by Bill. Unzip it and rename the folder's filename to "ESPixelStick" by removing the '-master' suffix. It should look like this when you're done:

9. With the ESPixelGECE board powered DOWN, connect the USB --> Serial adapter to the ESPixel board again as described on Bill's Site. This is how mine was connected:

10. Navigate to File --> Open to locate and open the "ESPixelStick.ino" file downloaded and unziped back in step 8. This will open another Arduino window with the ESPixelStick sketch.
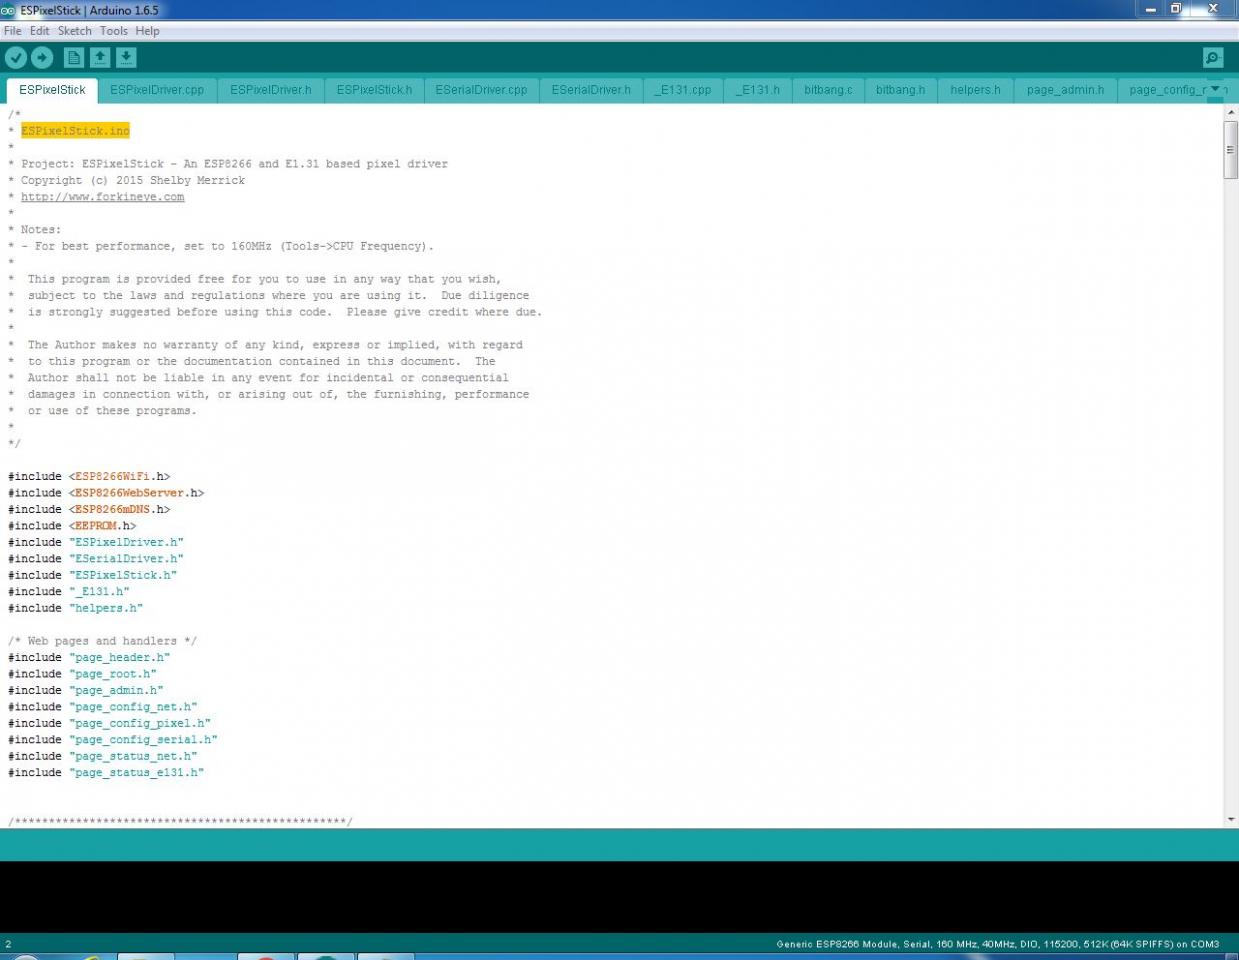
11. Adjust the CPU frequency that the sketch will compile at from Tools --> CPU Frequency:xyz (should be set to 160MHz)

12. Power UP the ESPixelGECE board while holding down the PROG button labelled as "S1" on the PCB. You only need to hold this down for a moment while the board powers up and not throughout the entire upload/programming process. Then click on the 'Upload' arrow icon to begin compiling and transferring the sketch to the board. You will see a progress report in the bottom section of the screen throughout this process.

13. Once the upload is complete, power down the ESPixel board, unplug the programming cable then power the board back up and return to Bill's write up and scroll down to the "Configure" section to finish the setup which will all be via WiFi and web browser from here on out.
Good luck and hopefully this is of some use.
Shane

If people still have trouble after that picture guide, I'll break down and make a video of how to do it. But I t wouldn't be for a few weeks.
Thanks Shane!