HLS Dimming Curves
Introduction
Dimming Curves can be applied to specific lighting channels. Dimming curves allow you to adjust the "curve" of a light's intensity based on that light's DMX intensity value set in the sequence software.
DMX allows for 256 levels of brightness, or intensity. Level 1 is the lowest value of light, and level 256 is the brightest. In an HLS sequence, when you set an intensity of 50%, for example, this is equivalent to turning that channel's light on at a brightness level of 128. This is the default behavior in HLS when no dimming curve is applied.
Human vision does not recognize brightness on a 1:1 scale. "In general, eye sensitivity to light increases exponentially with the decrease in light intensity..." (telescope-optics.net). Vision works more on a non-linear scale, with eyes detecting changes in contrast from A-B more than actual brightness. Eyes are also more sensitive to light changes at lower levels than higher levels. This website, while it deals with looking at stars, discusses this quite thoroughly: Telescope-optics.net
The reason incandescent lights appear to fade "smoother" than LED lights is because incandescent light tends to dim at a similar curve to the human eye, while LED lights dim on a linear 1:1 curve (Sandevices). So LED gives an appearance of not having much dimming in the lower levels, and not much dimming in the higher levels. This makes LED's look like they do not have as much range when dimming, but it is actually due to the human response to light levels.
To counter for this, Gamma Correction was created. This is used in a lot of display technology, such as monitors and televisions. The idea is to take what we know about human response and mimic that curve. (Wikipedia: Gamma Correction). This is what HLS does with Dimming Curves. You can customize a curve to dim a LED light at levels which are more reflective of the human eye.
Creating a Dimming Curve

- To begin creating a Dimming Curve, click Library -> Dimming Curves.
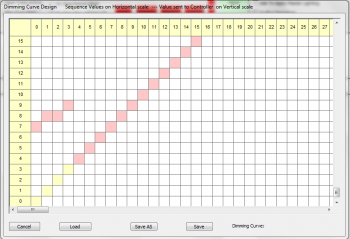
- Figure 12-2 will appear.
- You can adjust the curve by left-clicking on the salmon colored cell (you may have to scroll down to see them) and then clicking on the cell where you want it to be.
- Sequence Values are on the horizontal scale; Controller Values are on the vertical scale. What this means is that you adjust the horizontal value for a dmx value and set it to the vertical value you want to go to the controller.
- Example: You want a value of 50% in the sequence to be the 25% value on the controller. So, click the colored cell on the horizontal scale line of 128 and move it to the vertical scale value of 64.
Saving/Modifying Dimming Curves
- To save your custom dimming curve, click the Save As button.
- HLS will automatically open the file dialog box in the Dimming Curves folder.
- Type a name for your curve and click Save.
- To modify a dimming Curve, open the dimming curve window (Library -> Dimming Curves).
- Click the LOAD button to load a previously saved dimming curve.
- Make needed changes, then click the "save" button or "Save as" to save under a new name.
Applying a Dimming Curve to a Channel
You can apply a Dimming Curve to single channels, or you can select a dimming curve and assign it to a group of selected channels. First, open the Channel Manager (Manage Channels -> Manage Raw Channels).

To apply to single channels:
- Right-click in the Dimming Curve cell for the desired channel.
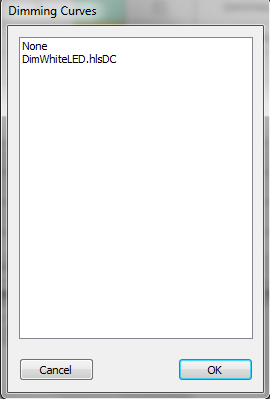
- Figure 12-3 will appear. Select the appropriate dimming curve and click OK.


To apply to a group of channels:
- In the channel manager window, click Get Dimming Curve File (see Figure 12-4).
- Select the dimming curve you wish to load.
- Select the channels you wish to apply the dimming curve to by clicking and dragging down to highlight.
- Click Add Dimming Curve to apply the curve to the selected channels.
- Dimming curves will be assigned as in Figure 12-5.
RGB Dimming Curves

RGB Dimming Curves are similar to regular dimming curves, except you can set specific curves for each color value.
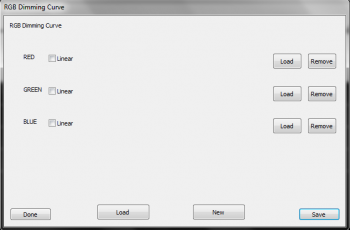
- Click Library -> RGB Dimming Curves. Figure 12-6 will open.
- Select Load and select individual channel dimming curve files for each color.
- Click New and name your file.
- Click Save to save it. Assign it to channels the same as with regular Dimming Curves.
Sane Default Curve
To help people get started on creating curves for LED lighting, a fairly sane default curve has been created. This curve is based on a thread in the DIYC forums that discussed dimming curves and appropriate DMX values for LED lights that will come closer to reflecting the dimming of incandescent lighting.[1]
This curve is based on white light and would need to be further refined for specific RGB Curves. Download here. Other members are encouraged to share their dimming curves as well.
| HLS User Manual and Reference Guide | ||
|---|---|---|
| Previous Page | Current Chapter | Next Page |
| Restoring a Sequence from Backup | Chapter 12: Reference Guide | Crosshair Cursor |