Using Audacity Labels
HLS can import Audacity labels to help automate precise beat track creation. First, make sure you have installed the Queen Mary Vamp plugins: http://vamp-plugins.org/download.html
Creating a Label Track in Audacity:

- Open Audacity and open your mp3 file.
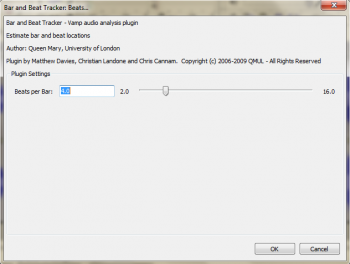
- Click Analyze -> Bar and Beat Tracker: Beats...
- The window shown in Figure 10.5-1 will appear. Select the beats per bar. This will place the specified number of labels for each measure of music. For example, if you choose 4, and there are 4 beats per measure in the song, you will have one label for each quarter note. Setting this to 8 would give you one beat for each eighth note, etc.
- (Audacity will now analyze the file to determine the beats.)
- Once complete, you will see the label track that has been created.
- Click File -> Export Labels.
- Save the resulting text file.
- Tip: Create a "Label Tracks" sub-folder in the HLS main folder for saving these files.
Adding the Labels to HLS

- Open HLS and either open the sequence that uses that audio, or create a new sequence using that audio.
- Open Channel Manager (Manage Channels -> Manage Raw Channels).
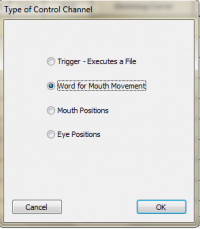
- Click Add Control Channel. Figure 10.5-2 will appear.
- Select "Word" and click OK.
- Scroll to the word channel and name it something meaningful (such as Audacity). Click Done with Changes.
- Add the Audacity channel to a display group and make that display group active.
- Right-click on the first cell in the word channel and select Add Audacity Label Track File.
- Labels will be added similar to those seen in Figure 10.5-3.
- Tip: Add the channel to the beat channel group or make it sticky so you can use it as reference.

| HLS User Manual and Reference Guide | ||
|---|---|---|
| Previous Page | Current Chapter | Next Page |
| Chapter 9: Sequence Output | Chapter 10: Advanced Hardware Configuration | Importing and Exporting CSV |